Posts

How to implement simple Pie Chart in app | Android Studio | Java | Android App Development

Image
In this post, you will learn how to implement Pie Chart in you Android Application with Java. What is Pie Chart and what are its uses ? Pie charts are used in data handling and are circular charts divided up into segments which each represent a value. Pie charts are divided into sections (or 'slices') to represent values of different sizes. Pie charts are a visual device to help us understand data more easily. Implementation: First, add the dependency for Pie Chart in build.gradle(Module: app) with latest version. implementation 'com.github.blackfizz:eazegraph:1.2.5l@aar' implementation 'com.nineoldandroids:library:2.4.0' Now, in the activity_main.xml file, add the following code: Now, in the MainActivity.java file, add the following code: (make sure to include your package name while copying the code) Output:
Builduing a Simple Flashlight App in Android Studio

Image
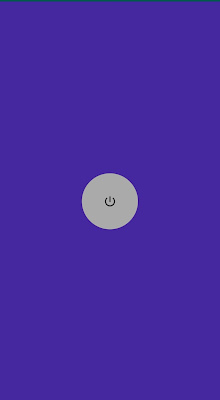
 In this post, you will learn how to create a simple flashlight app to enable or disable the phone's flashlight in android stuido using Java.     For building the app, first, create a new project and add the power icon from vector assets in your drawable folder. Now, create two new drawable resource files that will be the background for our switch on and switch off button. Add the following code to the files: Code for switch on button: Code for switch off button: Once this is done, in the activity_main.xml file, create the layout for the app screen. Add the following code: The background of the image buttons are the switch_on and switch_off drawable files that we created earlier. Now, in the MainActivity.java class , add the following code: Here the Camera used is Camera (android.hardware) and not the graphics one. Now finally, in the AndroidManifest.xml file, add the permissions to allow access to the device's  camera. <uses-permission android:name="android.perm...

ViewPager2 tutorial for Beginners: Android

  In this post you will learn how to implement ViewPager2 in your android app using Java. What is the use of ViewPager? Adding a ViewPager to the application UI allow the users to swipe forward and backward between views in the app. eg. A photo gallery app in which the users can swipe the images forward and backward. Implementing the ViewPager: First, add the dependency for ViewPager2 in the build.gradle(Module: app) with the latest version: implementation "androidx.viewpager2:viewpager2:1.0.0" Now , in the activity_main.xml file, add the following code: After that, create a new Java class that will be the Model class for the items to be displayed in the view .Add the following code: Now create a new layout resource file that will define the structure of individual view of our ViewPager. Add the code to it: Once this is done, create another Java class that will be the adapter for our ViewPager. An adapter basically binds the items to the respective views in the app. Add the f...

Multiplication Tables Android App

Image
In this post, we will be demonstrating how to create a simple multiplication tables app using Android Studio in Java. We will be using a ListView to display the multiplication table of a number entered by the user. ListView -   ListView in Android is a view which contains the group of items and display them in a scrollable list. ListView is a default scrollable which does not user other scroll view. Now that we know what a ListView is, lets begin making the app. For this, we will require an EditText where in the user can input a number, a Button and a ListView which will display the multiplication table of the number entered by the user. In the activity_main.xml file , write the code as follows: Now in the MainActivity,java file , when the user clicks the button, we will call the fillList() methodt that will populate our ListView with the multiplication table. Write the code as follows: We will need to create an an xml file that will define the structure of how the elements in...

Building very first Android App.

Image
 The best way to learn something is by actually doing it. So in this post, we will create a very basic android application using Android Studio in Java.  We will be creating a simple Coffee Cup ordering app . In this, we will handling button click events and toast messages. Toast message - A toast message is a simple message / feedback to the user about an operation in a small popup .It fills only the required amount of space for the message to be displayed and automatically disappears after timeout. Now, once you create your Android Project, in the activity_main.xml file, add an ImageView and add a coffee cup image as the source image to it. Then add 2 buttons; one to increment the coffee cups and another to decrement them. Also, add a TextView that displays the total number of coffee cups(Initially set to 0). And finally, add a Button to display the toast message. Follow the below code : Next, in the MainActivity.java file, initialize the views(3 Buttons and 1 TextView), and...

Upload an Image to Firebase Android

Image
Firebase is a mobile platform that helps you to quickly develop high quality apps, grow user base, and earn more. Firebase provides a variety of features and services that you can implement within your app as and when required. Various services provided by Firebase are  Cloud Firestore, Firebase ML, Cloud Functions, Authentication, Hosting etc. Today, we will show you how you can upload an image file from within your app to Firebase Database. First, create the layout required to upload the image file. For that follow the below code: Once done, add the following code to the java file of your android project. Make sure you have connected your project with Firebase.  Output :    

Bottom Sheet Dialog in Andriod application .

Image
Bottom Sheet Dialog box :  Bottom Sheet Dialog is a component that slides up from the bottom of the screen. There are two types of bottom sheets Persistant Bottom Sheet and Modal Bottom Sheet. Persistant Bottom Sheet : This bottom sheet shows in-application content. It will be shown at the base of the screen with a portion of its part noticeable , it shows full substance in the wake of growing it. Modal Bottom Sheet : This bottom sheet functions as a menu or discourse with choices, it implies this replaces menu or exchange. It has a higher height than the determined base sheet. For the most part, they are utilized for incorporating profound connecting picker activities.  How to implement bottom sheet dialog box in Android  app ? Bottom Sheet Dialogs are very commonly used in a lot of applications today. Here we will be imitating a bottom sheet dialog like the  Whatsapp App tha...